Monday, April 11, 2011

Health and Safety (WELDING)


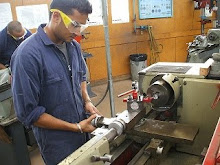
The gas welding plant consists of the 2 gas cylinders, oxygen and acetylene. The hoses, flashback arrrestors, gauges and the welding tip and torch. The video is a introduction about gas welding.


Safety Protection
When doing gas welding you must always wear safety equipment. As mentioned in the first part of health and safety you must wear proper steel toe safety boots and overalls to suit the job. You must wear 100% cotton overalls as it does not catch on fire from sparks and molten metals flying around. A welding leather apron can also be worn for more protection.


Eye safety is a must when doing gas welding. You must always wear the right type of gas welding goggles when doing gas welding. The goggles will protect your eyes from flying sparks and bursting molten metals. Also protects your eyes from the fumes that come out of the burning metals. I know people who did not use their googles properly and now suffering from very poor eye sight.


Leather gloves can also be worn for more protection to the hands. But I dont like wearing gloves as i dont get a proper fell of torch. For me welding without gloves is more better. But i am very carefull of not to touch hot metals and burning myself. I have burnt myself once when i picked up the filler rod from the hot side. Then i treated it by puting my finger under cold running water for about 10 minutes and it was just fine. So i tink it is a good practice to wear gloves to prevent yourself from burns.


Oxygen Cylinder


The oxygen cylinder is black in colour and the valve outlets are right hand threads.Oxygen cylinder is a solid drawn cylinder out of mild steel or alloy steel. Mild steel cylinder is charged to a pressure of  2000psi and alloy steel cylinders to  2500psi.Because of the possibility of the oxygen pressure becoming high enough to rupture the steel cylinder in case the temperature rises, an oxygen cylinder is equipped with a safety nut that allows the oxygen to drain slowly in the event the temperature increases the gas pressure beyond the safety load of the cylinder.An oxygen cylinder has an inside diameter of 21.6 cm, wall thickness 0.650 mm  and length  127.5 cm. In order to protect cylinder valve from getting damaged, a removable steel cap is screwed on the cylinder at all times When the cylinder is not in use.


You should never use bottled oxygen as compressed air. Never put oil or grease on oxygen guages, regulators or screw threads as pure oxygen reacts with the oil and can cause an explosion or spontaneous combustion. Keep this bottle very secure. If it drops and breaks the tap it becomes a live rocket due to the pressure. The video show how it dangerous the oxygen bottle can be.


Acetylene Cylinders


A acetylene cylinder is maroon in color and and all valves a screwed left handed. It can be easily recognised as the nuts have a cut or grove on them to show they are left hand threaded. This is also a solid draw steel cylinder with a pressure of  225psi. This is very low pressure compared to the oxygen cylinder.


The acetylene cylinder is filled with a porous type material that acts like a sponge. The sponge is filled with acetone. When the acetylene is compressed into the cylinder it is dissolved in the acetone. Never use the cylinder lying down orelse if there is a liquid draw into the hoses there can be explosions. Safe working pressure in the lines are up to 15psi. The video shows an acetylene factory explosion,


Safety With The Cylinders


Cylinders must be prevented from sharp impact with one another or with the ground.  Acetylene cylinders must always be kept upright.  A cap must be fitted on the cylinder while it is not in use.  Cylinders should not be exposed to welding flame, direct sun­ light, water, etc.  Cylinders should be well fastened at their places so that they do not fall.It should be stored in a well protected, well ventilated, dry location, well away from highly combustible materials such as oil or excelsior. One should not smoke at the place where gas cylinders have been stored. Cylinders containing acetylene and oxygen should be stored separately or quite far apart from each other.


  • Do not use a cylinder as an electrical ground connection.
  • Do not fasten cylinders to a work table or to structures where they could become part of an electrical circuit.
  • Do not strike an arc on a cylinder.
  • Do not use a flame or boiling water to thaw a frozen valve. Valves or cylinders may contain fusible plugs which can melt at temperatures below the boiling point of water.
  • Mark or label them as "Empty cylinder" and store empty cylinders away from full cylinders.
  • Return empties to the supplier.
  • Remove regulators when not in use and store these away from grease and oil. Put protective caps on the fittings when in storage.
  • Keep cylinders and fittings from becoming contaminated with oil, grease or dust.
  • Do not use a cylinder that is not identified or if the label is not legible. The colours of industrial gas cylinders are not standardized.
  • Remove the regulator and replace the valve protection cap before moving a cylinder.Move cylinders with appropriate trolleys. Use proper lifting cradles.Do not lift a cylinder by the valve cap..Do not drag, slide, or drop cylinders. If an acetylene tank has accidentally been left on its side, set it upright for at least one hour before it is used.Do not try to refill a cylinder or mix gases in a cylinder.


Pressure Guages


The pressure regulator has 2 gauges. One is the contents pressure and the other one is the working pressure you want to choose by turning the knob. Oxygen and acetylene use different gauges. Oxygen is right hand thread and acetylene is left hand thread. Therse are precision instruments and should be used very carefully. It should not be dropped.


Use the correct pressure regulator for a gas. For example, never use acetylene pressure regulator with any other gas. A pressure regulator shall be used, only, at pressures for which it is intended. Handle pressure regulators carefully. Cylinder valves should be opened slowly to avoid straining the mechanism of pressure regulators. Do not move the cylinder by holding the pressure regulator. For repairs, calibrations or adjustments purposes the pressure regulators should be sent to the supplier. Do cracking to take dust and dirt out of the valves and threads before connecting pressure regulator to the gas cylinder.
 Connections on regulators shall be inspected before use to detect faulty seats which may cause leakage of gas when the regulators are attached to the cylinder valves. Never use oil, grease or lubricant of any kind on regulator connections. Video Shows regulator safety and how it burn out when safety precautions are not taken.


Welding Hoses


These hoses are made of reinforced rubber and are color coded. Oxygen are normally black, green or blue. Acetylene hoses are maroon or red.  And also the fitting acetylene is left hand thread nd oxygen is right so you don't mixup when connecting up the hoses.


Hoses should always be checked for cracks burns and other damages. Never repair the hoses. It is a gud exercise to always change the hoses if damages. Always protect hose from being trampled on or run over. Avoid tangle and kinks. Never leave the hose so that it can be tripped over.Protect the hose from flying sparks, hot slag, hot workpiece and open flame. If dirt goes into hose, blow through (with oxygen, not acetylene) before coupling to torch or regulator. Store hose on a reel (an automobile wheel will do) when not in use. Never allow the hose to come into contact with oil or grease; they deteriorate the rubber and constitute a hazard with oxygen.


Welding Torch and Tips

The welding torch is where the 2 gases are mixed to get the working gas. There are 2 control valves one for the oxygen gas which is black or blue and the other one for acetylene which is red or maroon in colour. These valves are there to control how much of each gas you want to make your working flame.  The mixing chamber 
has the threading fitting in which the tips are fitted.


The tip and all fittings should be tight so that there is no gas leaks. Always leave the torch on the holder and turn it off when not in use.


Welding tips are made of pure copper and shaped inside to give an ideal welding flame. There are diggerent sizes of tips for different applications and heats. For general gas welding we used a 8mm tip and to make the flame a bit hotter we went for a 10mm. The tip cleaner is used to clean the tip when it gets noisy or the flame seems to be a bit out.


Gas torches and tips should be stored in clean boxes to avoid gas holes from becoming burred and choked with dirt. Never use a gas torch as a lever or hammer. A spanner and not a plier should be employed for changing tips. Screw tips only tight enough for a gastight Joint. All blow pipes and other apparatus shall be periodically dismantled and cleaned internally, preferably by the supplier. Gas holes must be clean, smooth and of correct size.During working, if the tip becomes overheated it may be cooled by plunging the torch into water; close the acetylene valve but leave a little oxygen flowing. Never hang a torch with its hose on regulators or cylinder valves. The video shows how to set up your plant properly.


Flashback Arrestors


A flashback arrestor is a device in the welding plant that prevents the flame burning back to the gas cylinders and causing explosions ad fires. This is a safety device and all welding plants should have it fitted. The arrestors are fitted to the regulators and are able to be reseted after a flash back occurs.


Flashbacks are caused by:


  • wrong gas sequence during start up
  • insufficient purging of gases before use
  • blocked,worn,undersized or overheated tips
  • hoses run over a vehicle during welding
  • incorrect gas pressures
  • blocked or kinked hoses
  • flame held too close to working surfaces
  • inappropriate use of the welding equipment
Flashbacks happen very quickly so before you could turn the system off the flashback arrestor shuts the gases from flowing ans saves you and your system from damage. It is a must to be in every welding plant and is part of the health and safety rule for gas welding. The Videos below show a good understanding about flashbacks and how the flashback arrestors work.


Welding Flames


Neutral Flame


A neutral flame is used for most weldings. It has roughly equal amounts of oxygen and acetylene. It can be recognized by a light blue inner flame cone with a darker blue outer flame. The neutral flame takes its name from the fact that it produces very little or no chemical reaction in the molten metal. In fact, the neutral flame actually acts as a gas shield to protect the weld pool from chemical reactions with the atmosphere. This flame is used to weld Mild steel, stainless steel, copper and aluminum. 


Carburising Flame


The carburising flame has excess acetylene and are used for specific processes. This can be done by reducing the oxygen. It contains three distinct levels of color: a very light blue cone at the nozzle, surrounded by an envelope or feather of darker blue; both of those are surrounded by an outer envelope of even darker blue.It is used for welding high-carbon steel and other metals that do not readily absorb carbon.  It is also used for hard facing materials as stellilte and silver bronze. If used for normal welding it will leave a lot of caron on the weld resulting in a poor weld.


Oxidising Flame


Oxidising flame has excess oxygen.The flame is shorter and bluer than both the neutral and carburizing flames, and the inner cone is more pointed. The excess oxygen from this flame will combine with the metal and form oxides, which are brittle and weaken the weld and the metal. Because of its oxidizing properties it is seldom used to weld steel, but is sometimes used for copper-based and zinc-based metals, as well as cast iron and manganese. A slightly oxidizing flame is used in braze-welding and bronze-surfacing while a more strongly oxidizing flame is used in fusion welding certain brasses and bronzes.


The video shows different flames types.


References


http://en.wikipedia.org/wiki/Oxy-fuel_welding_and_cutting
http://www.welding-technology-machines.info/gas-welding-processes-and-equipments/oxygen-gas-cylinder.htm
http://www.airproducts.com/nr/rdonlyres/9d325c49-7c62-41e5-aa0b-8411db4d84f8/0/safetygram13.pdf
http://www.ccohs.ca/oshanswers/safety_haz/welding/storage.html
http://www.hse.gov.uk/pubns/indg297.pdf
http://www.commerce.wa.gov.au/worksafe/PDF/Guidance_notes/WSguidnote_flashback.pdf
http://www.weldreality.com/gasdata.ht

http://en.wikipedia.org/wiki/Oxy-fuel_welding_and_cutting#Types_of_flame

Sunday, April 10, 2011

Trailers

Boat Trailers


Materials Used

Boat trailers are generally made of galvanized mild steel or aluminium. When using mild steel the trailer is painted with a protection paint coating to stop it from corroding away. Generally boat trailers should be made out of metals which doesn't not rust easily and strong enough to hold the boats weight.  Galvanized mild steel is most commonly used as its the cheap. Its strong and rust resistant. Galvanizing is a process in which the steel is coated with a layer of zinc to protect it from rust. Mild steel is also easily fabricated and welded. More easier to make than aluminium.

Aluminium is not that common because of the cost. It is also hard to fabricate and weld. Although aluminum is very strong, light and corrosion resistant it comes out to be more expensive. Bellow is a boat trailer mad out of aluminum.


Single Axle Trailer


Boats less than 6 meters and less than 2000kg are carried on a single axle boat trailer. Single axle trailers can me moved very easily and more easier to backup than double axle and triple axle.

Double Axle Trailers


Double axle trailers provides better weight distribution on the trailer. Used for boats longer than 6 meters or over 2000kg.  It is also harder to reverse and harder to move with hand. Tyres and bearings get worn out quicker that single axle. An advantage is that if you have a flat tyre and do not have a spare tyre you can take the flat tyre out and continue driving to the nearest tyre shop. Try that with a single axle!


Triple Axle Trailers


Triple axles are used with boats more than 10 meters and heavier than 4000kg. These include cabin crusiers , sport yachts and racing style power boats. These types of trailers provide a bigger foot print and geat stability. There are other muli axle trailers used for bigger applications and what the customer wants.

Trailer Designs

Trailer designs vary to the need of the customer and purpose of the design. These are normally a A frame or a single drawbar.

Single Drawbar 


This type of trailer is used for small boats example jet skies and small dingies. It is not as strong as the A frame type as all the weight is on the drawbar and sometimes breaks at the joining of the frame and the drawbar. 

A Frame Draw bar

 The A Frame design is stronger than the single frame as the weight is evenly disributed around the trailer. This design is used for bigger boats and is more reliable than the single drawbar.

Bunk Type Trailer


This type has two bunks of wood to support the keel. One bunk on each side supports the keel. They are padded with a materal to prevent scrathing or damage to the keel. Good for flat bottom boats.

Roller Type Trailer


This type uses plastic or rubber rollers to support the boat. The rollers make the boat easier to launch and pullin. The boat easily slide on the rollers. This type is more expensive than the bunk type but way better to use. This type is more in use these days.

Dimensions and WOF

You can tow a trailer that's up to 2.5m wide, 4.25m high when loaded, and 11.5m long, as long as the combined car and trailer length does not exceed 20 metres. The driver of the car towing a trailer (not another driver, and not the owner of the trailer) is responsible for any damage that happens while towing. If the trailer has a safety problem, such as an expired WOF, the driver of the towing car is responsible. The weight depends on the vehicle and type of trailer regarding the types mentioned previously on the blog.


Warrant of Fittness

All trailers must have a current warrant of fitness and registration to be driven on the road.  To meet the WoF standard your trailer must be in good condition and it must have the following equipment in good working order:


  1. A safe and strong coupling and a safety chain.
  2. If the trailer or its load is more than 2 metres wide, it must have two white lights at the front to show how wide it is.
  3. Safe tyres – the tread depth must be at least 1.5 millimetres right around the tyre.
  4. Mudguards.
  5. Two red reflectors at the back (one on each side).


  1. Two red lights at the back to show how wide the trailer is.
  2. Direction indicators at the back.
  3. Two red stop lights at the back, if the driver's signals can't be seen.
  4. A number plate light at the back.
  5. A current trailer WoF issued by a WoF inspector. This must be renewed:
    • every 12 months for the first six years, then
    • every six months after.


Suspension Types

Good suspensions on the trailers will extend the overall life of the trailer. This will also protect the boat from jumping around and keep in place.

Leaf Springs


Leaf springs are the most comon type used in standard trailers. The spring is dependent on the amont of leafs (metals) there is and how it is configured. The leaf springs are noisy on the road and weight on these types should be considered.

The strut type (shock absorber and spring)

These are a very rare type of suspension used in boat trailers. It is generally expensive but a good suspension with a combination of a spring and shock absorber. Custom trailers use this when the customer wants this type of suspension used in their trailers.

Torsion Axle Suspension


This type is a a step away from the leaf type but less expensive than the stut type. Torsion bars are cushioned and held in place in the axle housing by a block of rubber or individual rubber chords. The hub of the wheel is mounted on a leaver arm on the outer end of the torsion bar. This is generaly used in small boat trailers.

Wheels and tyres


Trailer wheels are generally galvanized steel and also alloys. Its up to the customer and application it is used for. Some heavy boats might need heavy duty wheels to compensate the weight. Choosing the wheels can be for looks as well. Its all about what the customer wants.

When looking at tyres. First of all the thread on the tyre should be WOF acceptable which is a thread depth of 1.5mm minimum. The type of thread is also considered as to where it is being used. Example there is a different thread for snow. You can choose what type of tyres you need for the purpose. Radial tyres are best considered for everyday use as it is cheap and haas a strong construction which can handle a bit of dings and dangs. You should also check the load rating on the tyres to which how much weight it can handle. Always check your tyres for cracks and bubbles regularly.

Hubs and Stubs

Hubs are designed to support the axle and provide a base for the wheels ot be mounted on. They are usually galvanized steel to protect from rust. They also have a weight rating which should be taken in consideration when choosing the hub to be used on the trailer.


Stubs are where the wheels get bolted on. The wheels should fit in correctly and the wheel should be secure in place with the wheels tighten to the right torque specification.

Brakes

Elecctric 


These brakes are electronically operated when the brake pedals are pressed in the vehicle. It is ocnnected with the brake lights. When the brakes are applied the control unit sends a signal back to the brakes in the trailer and starts breaking. If the trailer detaches itself the breaks will lockup and the trailer will stop. This is a 
good safety feature for this type of breaking on the trailer.

There is also the disk and drum type breaks which like the ones in the cars. It is alctivatd by hydrloc pressure to put pressure on the disk or the drum to get the wheels to stop. Below is the disk type with break pads.


Hydrolic Surge

Hydraulic surge brakes are a totally trailer self-contained braking system, requiring no electrical, hydraulic or other connection of brake sensing components to the tow vehicle for automatic operation of the trailer brakes. In a hydraulic surge brake system, the inertial differential pressure developed between the tow vehicle and the trailer, during the braking process, creates a mechanical pressure which is applied to the push rod of the master cylinder in the hydraulic surge brake coupler. This mechanical pressure is proportional to the difference in pressure between the two vehicles and therefore, the hydraulic output of the brake coupler, and resulting brake operation, is automatic, regulated, and proportional to the amount of braking being applied to the tow vehicle.These systems can use disk or drum or sometimes both for parking and breaking capabilites for heavy  duty trailers.

Bellow is a Drum brake assemply


Lights


Lights are ma must on trailers as to let others know when you are breaking and turning etc. The trailer will not pass a warrant of fitness test if the lights were not working. You should always check the lights as its a very important thing. Lights not working properly can cause a lot of crashes and problems with other drivers as they will not know what you are doing and cause major problems. And its a rule that the trailer should also be fitted with a set of reflectors in each side.

These days there are LED lights used which are brigher and uses low power. So in consideration LED lights is the way to go.

Winches 

Boat winches come in two types. The manual type and the electric type. It can be made up of cabe, rope or different types of chains and strapings. The rope and strap type are the best used in the marine industry as it will not rust.


Electronic winches are more expensive but easier to use. Again winches will be choses as what the customer wants and how much he is willing to spend on the trailer. Winches should be mounded properly.


Couplings 


This is the non braked type coupling. This is located at the end of the drawbar and gives a secure connection with the trailer and the tow bar of the vehicle pulling the trailer. Also weight and force rating of the couplings  are considered when choosing what size boat trailer it will be used for.. This non braked coupling us mainly used in small application example a trailer for a jet ski or dingy where the vehicles braking is sufficient enough to brake the trailer.


This is the braked type coupling which has a master cylinder and brake lines that will create hydrolic pressure when the towing vehicle slows down. The pressure is applied to the brakes in the trailer wheel which also brakes the trailer. Read Hydrolic surge system on top of the page. This type is being used in big applicaitons 
and now days coming in most trailers used.

References

http://www.trojan.co.nz/
http://www.voyagertrailer.co.nz/
http://www.consumer.org.nz/reports/towing-rules
http://www.nzta.govt.nz/resources/factsheets/13d/trailers-light-simple.html
http://www.nzta.govt.nz/resources/roadcode/about-your-vehicle/light-trailer-requirements.html


Thursday, March 31, 2011

Health And Safety Part 1


I think i know a fair bit about health and safety. I consider it as you or anyone else being safe and in good health without hurting yourselves doing anything. As little as walking, the ground surface should be safe to walk on. That is health and safety. It is a rule people must follow in order to keep themselves safe.


I am going to do research and understanding in health and safety in the workshop. Before you can use equipment and machines or attempt practical work in a workshop you must understand basic safety rules. These rules will help keep you and others safe in the workshop.


1.  Never work alone.
At least two adults must be in the shop when power tools are being used. 
2.  Never work when you are impaired.
This includes when you are too tired, stressed or hurried to work carefully.
3.  If you cannot do a job safely in this shop, don’t do it. 
There are limits to what we can build here. 
4.  Always wear closed-toe shoes in the shop. 
Tools, chips and fixtures are sharp, and often hot. Shoes will help protect your feet from 
injury. Leather shoes are preferred when welding. 
5. Eye protection is essential. Always wear safety glasses when working or cleaning 
tools. 
6. Remove or secure anything that might get caught in moving machinery. 
Rings, necklaces, long hair and loose clothes that get caught in tools can drag you along.  
7. Keep your hands away from sharp tools. 
Make sure that nothing that you do will cause you to be cut. 
8.  Dust, chemicals and smoke can be dangerous – work in well-ventilated areas, 
minimize contamination and use appropriate protective equipment.
The safety equipment cabinet is on the patio. 
9.  If you’re unsure about the safe operation of a tool or any aspect of a job – ask for 
help! Have shop staff check you out on a tool the first time you use one with which 
you are unfamiliar.
10. Clean up after yourself. 
Before you leave the shop each day all tools must be returned to the toolbox, the machine 
cleaned and wiped down and the floor swept. Leave 10-15 minutes for cleanup.


Reference:
 http://me.ucsb.edu/course_pages/me153/safety_handbook.pdf


Safety Equipment


Wearing the proper equipment on the job is very important. The safety gears can will always protect you from injuries. Before entering the workshop overalls and steel cap boots must be worn at all times.


Overall


Work clothing has two important functions. Firstly, it protects or replaces normal clothing which is more expensive and often unsuitable for working conditions. Secondly, it protects the worker from various hazards likely to be encountered in the workplace. The material is also considered when chooseing overalls for example when welding you need 100% cotton overalls otherwise when molten metals falls on the paper or polycotton overalls it burns through.


Boots


Safety boots have a steel toe cap and sometimes have a steel sole. The steel toe cap protects the feet from being crushed or damaged from falling objects. The steel sole protects the feet from objects puncturing the sole. The sole also comes oil resistant which wont slip in slippery situations. 


Safety goggles must be worn when working with equipment where objects and dirt are being fling around such as drilling and working on the lathe. It is very important as it protects the eyes from getting damaged.


Ear muffs must be worm when working in noisy environments. Protects the hearing from getting damaged. People who do not use ear muffs loose their hearing after a while.


Here is a video about safety equipment.


Hazards


A hazard is anything unsafe or unhealthy in the work place. You should always identify hazards and eliminate. Example if theres is a water or oil spill on the workshop floor, the first person who finds it should clean it up before someone slips and hurts themselves. This is looking after your safety and others. It couldd also be as simple as trailing cabling, worn carpet or exposed wiring. Poor lighting can also be a hazard. You should always identify and eliminate hazards. Here is a animation showing sum tips about hazards.


First Aid


Everybody should know where the first aid kit is located in the workshop. If any one is injured we should do first aid on them. It is very important to know where the first aid kit is kept so that you can use the material when in need giving first aid. Everyone in the workshop should do a first aid course as we have done 4 weeks ago. First aid kits should always be checked and re stocked. 

Treat the injury.
Call 111.
Collect information from the patient example name, address, date of birth and other medical condition's etc.
Reassure the patient that he will be ok and is well looked after.
Always be prepared to do CPR.

I think everyone should do a first aid course as i have learnt alot from it. First Aid saves lives. Here is a video about first aid kits in the work place.


Fire Extinguishers


A fire extinguisher is a device used to control or eliminate small fires. A fire extinguisher is a must in the work place and workers should always know where it is kept and how to use it.  It should also be checked and serviced regularly. Some fire extinguishers have exploded due to maintenance and have caused death. There are many different types of fire extinguishers. The video below shows the 3 major types of fire extinguishers used.


The other 2 types the video has not covered are the foam type which is generally used ob fuel fires and the class d type which is handles fires on all types of metals. More details in depth about fire extinguishers can be found here -  http://en.wikipedia.org/wiki/Fire_extinguisher.


Everyone should also know all fire exits in the building they are working in. This is very important. Before starting work your employer should take you for a tour around the workplace showing you where fire exits are around the building.


WHEN USING ANY TOOLS OR POWER EQUIPMENT YOU SHOULD  NEVER EVER BE INTOXICATED OR ON DRUGS OF ANY SORT.


Lathe Safety


When using the lathe you should always wear proper safety equipment. Eye protection is a must when operating the lathe as small pieces of metal fling around while machining. Appropriate clothing should also be worn as clothing might get caught on the lathe and pull you in resulting in major injuries. Long hair must be tired up ans that might also get caught in the lather and cause injuries. NEVER LEAVE THE CHUCK KEY IN THE CHUCK. This can cause major injuries if the lathe is turned on with the chuck key in it. Wear safety shoes and remove all jeweleries while working on the lathe.


1. Make sure that the chuck, driveplate, or, faceplate is securely tightened onto the lathe
spindle.
2. When removing the chuck, driveplate, or faceplate do not use machine power.
3.  When installing the chuck, driveplate, or faceplate do not use machine power.
4. Move the tool bit a safe distance from the collet or chuck when inserting or removing
work.
5. Don't run the machine faster than the proper cutting speed – consult a speed and feed
table to determine the best speed.
6. In setting up the tool holder place it to the left side of the compound slide to prevent the
compound slide from running into the chuck or spindle attachments.
7. Always clamp the toolbit as short as possible in the toolholder to prevent it from breaking
or chattering.
8. Always make sure that the toolbit is sharp and has the proper clearance. Ask for
assistance making adjustments.
9. If any filing is done on work revolving in the lathe, file left handed to prevent slipping
into the chuck.  Never use a file without a handle.
10. If work is turned between centers, make sure that proper adjustment is made between
centers and that the tailstock is locked in place.
11. If work is being turned between centers and expands due to heat generated from cutting,
readjust centers to avoid excessive friction.
12.  Do not grasp or touch chips or turnings with your fingers, but get rid of them using a
blunt instrument. It is safer to turn off the lathe before clearing chips then to leave it
running.
13. Set the toolbit on the centerline of your work to prevent work from climbing over tool or
cutting above center and dragging.
14. Don't cut work completely through when turning between centers.
15.  Remove chuck key from chuck immediately after using.
16. Turn chuck or faceplate through by hand before turning on the power to be sure there is
no binding or clearance problem.
17. Stop the machine before taking measurements.
18.  Before cleaning the lathe remove tools from the tool post and tailstock


Reference - http://me.ucsb.edu/course_pages/me153/safety_handbook.pdf


Here is a video showing a person trying to play around with the lathe and resulting in major injuries.


lucky his colleague turned the late off orese it probly would have ripped his foot out.


Drilling  Safety


Before using the drill press wear proper safety goggles, proper clothing and safety boots. Do not wear loose clothing and jewelery or gloves while operating.  Always keeps hands away from the drill bit while operating.


1. Run drill at correct RPM for diameter of drill bit and material. Ask shop personnel for the
correct RPM.
2.  Always hold work in a vise or clamp to the drill table.
3. Use a correctly ground drill bit for the material being drilled. Shop personnel can help
select the correct bit.
4. Use the proper cutting fluid for the material being drilled. Ask the shop staff about the
appropriate fluid for the material you are machining.
5. Remove chips with a brush, never by hand.
6. Ease up on drilling pressure as the drill starts to break through the bottom of the material.
7. Don't use a dull or cracked drill.  Inspect the drill before using.
8. Don't drill with too much pressure.
9. Always try to support part on parallels or a backing board when drilling thru material.
10.  Never place taper shank tools such as large diameter drills or tapered shank reamers in a
drill chuck. Only straight shank tools such as standard drills can be clamped in chucks.
11. Always clean drill shank and/or drill sleeve, and, spindle hole before mounting.
12. Remove taper shank tools from spindle or sleeve with a drill drift and hammer.
13.  Never try to loosen the drill chuck while the power is on.
14. Lower the drill spindle close to the table when releasing the drill chuck or taper shank
drill to reduce the chance of damage should they fall onto the table.
15.  Never clean a machine while it is in motion!!
16. If the drill binds in a hole, stop the machine and turn the spindle backwards by hand to
release the bit.
17.  When drilling a deep hole withdraw the drill bit frequently to clear chips and
lubricate the bit.
18.  Always remove the drill chuck key, or, the drill drift from the spindle immediately after
using it.
19. Wear safety eye protection while drilling.
20.  Let the spindle stop of its own accord after turning the power off.  Never try to stop the
spindle with your hand.
21.  Plexiglass and other brittle plastics can be difficult to drill. Ask the shop superintendent
for advice on drill and coolant selection when drilling these materials


References - http://me.ucsb.edu/course_pages/me153/safety_handbook.pdf


The video shows general safety with the drill press.


Grinder Safety


Just like the other equipments safety gears must always be worn at all times. Cotton overalls must be worn as there will be sparks and other types of overalls might catch on fire ie; the paper type. Eye protection must be worn at all types.


  • Fasten pedestal and bench grinders securely.
  • Ensure all the guards are in place and secure before using a grinder.
  • Adjust tool rests to within 3 mm of wheels. Never adjust rests while wheels are moving. Work rest height should be on horizontal centre line of the machine spindle.
  • Maintain 6 mm wheel exposure with a tongue guard or a movable guard.
  • Check the wheel fits properly to the spindle when mounting. If it is loose, get another wheel.
  • Stand to one side of the grinder until the wheel reaches operating speed.
  • Bring work into contact with the grinding wheel slowly and smoothly, without bumping.
  • Apply gradual pressure to allow the wheel to warm up evenly. Use only the pressure required to complete a job.
  • Move the work back and forth across the face of the wheel. This movement prevents grooves from forming.
  • Wheels are made only for grinding certain items. Do not grind rough forgings on a small precision grinding wheel
  • Ensure the grinder speed does not exceed the operating speed marked on the wheel.
  • Visually inspect wheels for possible damage before mounting.
  • Wear proper personal protective equipment:
    • eye, ear and face protection,
    • metatarsal safety boots, where required,
    • respiratory protection may be required, depending on the work.
  • Wear gloves only where necessary.
  • Do not use a wheel that has been dropped.
  • Do not use a wheel that does not fit properly to the spindle.
  • Do not use excessive force to tighten the nut of the wheel. The force can crack the wheel.
  • Do not grind wood, plastics and non-iron metals on ordinary wheels.
  • Do not leave grinding wheels standing in liquids. The liquid can cause balance problems.
  • Do not grind on the side of a regular wheel.

The animation shows safety with grinders.


Milling Machine Safety


Using the milling machine, safety equipment should always be worn. Proper eye protection should be worn at all times when operating the milling machine. Before starting, make sure that:
  1. all guards are in place
  2. work is properly secured in place
  3. bolts used to hold down work clear the tooling
  4. tooling and supporting pieces are properly tightened in position
  5. table stops are secured properly
  6. handles on all feed screws are in neutral
  7. table is free of stock, tools or other loose material
  8. the arbor and arbor support are clear of the work
  9. Do not wear gloves, rings, watches or loose clothing. Tie back long hair.
  10. Do not attempt to mount, measure or adjust work until cutter is completely stopped.
  11. Do not use an excessively heavy cut or feed as it can cause the cutter to break. The flying pieces could cause serious injury.
  12. Do not reach over or near a revolving cutter. Keep hands at least 30 cm (12 in.) from a revolving cutter.
  13. Do not lean or rest hands on a moving table.
  14. Do not make any adjustments while the machine is running.
  15. Do not use paper shims to check the distance from the cutter to the stock.
  16. Do not move the operating levers without knowing what they control and what action is going to take place.
  17. Do not leave machine unattended while it is running.
The video shows a milling machine injury due to not following safety measures.


Hand Tools


Using hand tools you must also wear the right safety equipment. Safety is a state of mind. Always think when using a tool: Is it in good condition? Is it sized right for the job? Is it in the proper working condition?Every tool was designed to do a certain job. Use it for its intended purpose.

  1.  Keep your tools in good condition: sharp, clean, oiled, dressed and not abused. Worn tools are dangerous. For example the teeth in a pipe wrench can slip if worn smooth, an adjustable wrench will slip if its jaws are sprung and hammer heads can fly off loose handles. 
  2. Tools subject to impact (chisels, star drill, punches, etc.) tend to "mushroom". Keep them dressed (sharpened) to avoid flying spalls. Use tool holders. Do not force tools beyond their capacity or use "cheaters" to increase their capacity.
  3.  Secure your work in a vise whenever possible. Never hold small work in your hand when using a screwdriver. Chisels, screwdrivers or other pointed tools should never be carried in clothing pockets. Use tool belts designed for carrying tools. Hammers should have heads ground properly. Should not have broken claws or handles. 
  4. Check for loose handles. Always use proper size and weight for the job. Cutting tools should be kept sharp to ensure good smooth cutting.
  5.  Always use proper handles. Drill Bits should be kept sharp, not dull, chipped, rounded, or tapered.
  6.  Screwdriver points should not be badly worn and handles should be in good condition. Use the proper size and type of screwdriver for the job. 
  7. Wrenches, if adjustable, must work freely and adjust properly. Gripping teeth or smooth jaws should not be worn. 
  8. Always use the proper size for the job. Always wear the PPE required for the job. Protect your eyes, hands, ears and other body parts. Keep clothing out of your work.


Simply with hand tools, use the tools what it is designed to do. Learn the right way to use it and you will not hurt your self. Follow basic safety procedures. Handle tools with safely and with care. Here is a video demonstrating how you can hurt you fingers with general hand tools.


References